Showing posts with label Cooking and Recipes. Show all posts

6.03.2015

Review & Giveaway: Mary's Secret Ingredients Subscription Box

Review & Giveaway: Mary's Secret Ingredients Subscription Box

I have always considered myself a foodie.  I love food, there's no denying it, and I love lots of different kinds of food.  In fact, there isn't much I don't like, except maybe Uni (so chalky and bitter).  So when I was contacted by the fabulous people behind the subscription box Mary's Secret Ingredients to do a review, you'd better believe I was more than a little excited.  Let's face it-I like subscription boxes as much as I like food.

Mary's Secret Ingredients is a surprise culinary subscription box created by Mary Pisarkiewicz,  who is the blogger behind LOVE-the Secret Ingredient.  The box has limited quantities and ships out once per quarter, and it is seasonally themed and filled with goodies hand-picked by Mary and her team.  In the box she shares some of her favorite foodie products, recipes, and tips and tricks for even more goodness in the kitchen.

Review & Giveaway: Mary's Secret Ingredients Subscription Box

When my box arrived, I could barely contain myself with excitement.  I opened it up and dug through all of the wonderful goodies inside.  I instantly wanted to try it all! This is the Mary's Secret Ingredients Spring Box, which is now sold out, but I expect nothing short of this awesomeness next box.

Review & Giveaway: Mary's Secret Ingredients Subscription Box

Included in the box, and my opinions of each product, are:

Delta Bred Cheese Straws:  I usually don't like cheese straws, which was the first thing I thought when I opened this box up and decided to try one.  Yet these and a rich smokey cheese flavor and a kick of spice at the end.  While I can still only eat one or two at a sitting before I don't want anymore, I do think I'll continue eating them-much to my surprise!

Review & Giveaway: Mary's Secret Ingredients Subscription Box

Reids Maple Pecan Oatie Bites: This was perhaps my favorite thing in the whole box, and I have eaten the entire package.  They're like little crumbly oat cookies, and the maple pecan flavor is sweet (but not overpowering) and to dream of.  It's kind of milky, but not really milk flavored.  Hard to explain, but suffice it to say I immediately got online to find out where I could order more, since they're made in Scotland.  Thankfully Mary's Secret Ingredients links you to everything in their Marketplace.

Samba Flavor Chimichurri Spices:  This is a powdered herb mix with instructions right on it to make a Chimichurri sauce. Funny enough, I tried Chimichurri sauce for the first time from a food truck the other day, so now I'm excited to try this!  I have yet to make this sauce so I cannot review it, but I'll be back to do so when I have.

Savory Choice Pho Concentrate: Pho is one of my favorite dishes, and my friends and I go out for Pho quite often.  I've said many times that I've wanted to try and make it at home, and with this concentrate I can!  I have yet to try this product, and will be back to update with a review once I have.

Review & Giveaway: Mary's Secret Ingredients Subscription Box

Loaker Cremkakao: This chocolate bar was a really light flavor and a creamy chocolate.  I prefer a richer style of chocolate typically, but this one had great texture and was still very enjoyable-I mean I still ate the whole thing in one sitting.  Chocolate is chocolate, right?

Review & Giveaway: Mary's Secret Ingredients Subscription Box

Shirataki Harvest Noodles: These were interesting to me.  It's like a microwave dinner, but it can just store in the cupboard instead of the freezer.  The idea is great, because then you could store them in your desk at work and they have very few calories in them. Alas, very few calories usually means no flavor, and these were no exception.  They kind of remind me of Spaghetti-Os, but with less flavor.

Chef's Planet Cit-Trease: This is a tool meant for taking citrus out of their peels.  It kind of looks like the tools you use for brushing horses...  Have not tried it yet, but it could definitely be useful in the kitchen!  Especially if you want to use those campfire brownies that you make in Oranges, or those jello shots you make in lime peels.

Over all, I was really impressed with what I received, and I think I'll probably at least try their next two boxes for Summer and Fall.  Especially since I'm getting back into cooking and enjoying it so much.  Plus, if you sign up for their newsletter on their homepage they'll send you tips, recipes, and a 25% off code for your first box!


Review & Giveaway: Mary's Secret Ingredients Subscription Box

The amazing people over at Mary's Secret Ingredients are offering one lucky winner their Summer 2015 box for free!  The Summer boxes are top secret (but I'm sure you'll love it) and will ship out on June 25th!  Giveaway is open to residents of the USA only, and will end at 12AM on Monday, June 15th, 2015.  Entering below agrees to all terms within the rafflecopter.


6.22.2014

The Weekly Round Up: Food Edition

♥ Shane from Whispering Sweet Nothings posted this great recipe for Oriental Chicken Salad!  YUM! 

♥ Sarah from Fantastical Sharing of Recipes shared this recipe for Toffee Struesel Baked Chocolate Donuts!

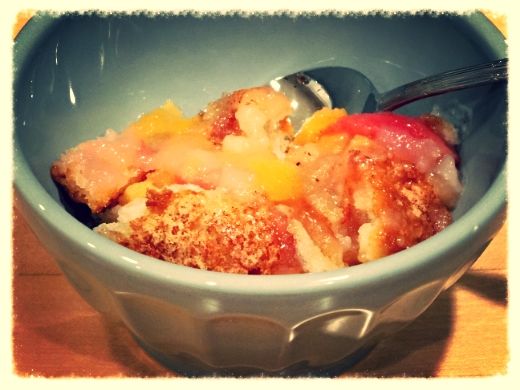
♥ Ricki-Jill from Art @ Home shared The Only Peach Cobbler Recipe You'll Ever Need.  LOVE!

Oh Rocky shared these delicious looking Zucchini Fries as a great Movie Snack!  I bet they are!

Living in Yellow shared a Cowboy Crack Chip Dip that she insists we all try!  It looks really tasty!


The Weekly Round-Up

Share your favorite reads this week!
The point of The Weekly Round-Up is to focus on other people instead of just another post about ourselves.  It's to build better community, share insight into what we love to read, and hopefully introduce you to a new blogger you'll love and adore!  Wanna play along?  Write a post with links to your favorite blog posts from others throughout the week, put the button in it, and link up with us on Sundays!

4.10.2014

Recipe: Stuffed Acorn Squash

Recipe: Stuffed Acorn Squash

I have been on such a squash kick lately.  A while back I shared a recipe for Cheesy Curried Mushroom & Onion Stuffed Delicata Squash, and now I'm sharing this one for Stuffed Acorn Squash.  It was sooooo tasty, and can pass as vegetarian.  This can even be a good vegan meal if you leave out the cheese.

What you'll need:
  • Acorn Squash - 1 half for each person (it's incredibly filling)
  • Mushrooms (sliced)
  • Spinach
  • Onions (diced/minced)
  • Garlic (minced)
  • Butter (or substitute-I used Smart Balance)
  • Seasonings - your choice
  • Cheese (I used Vintage Cheddar and Havarti)

1. The first thing you'll want to do is get your Acorn Squash cooking.  Place it in an oven-safe pan and puncture it a few times.  This allows the steams to release (so it doesn't explode) while it's baking.  It'll take roughly 45 minutes to an hour at about 365 degrees.

Recipe: Stuffed Acorn Squash - Baking an Acorn Squash

2. About half an hour into the baking you'll want to start your sautéing.  In a large skillet melt your butter (or substitute) and add your garlic and onions so they can start cooking and season your pan.  

Recipe: Stuffed Acorn Squash - Fry Onions & Garlic

3. When the onions and garlic are starting to look good and soft-golden brown, add your mushrooms in to cook.

Recipe: Stuffed Acorn Squash - Fry Mushrooms

4. Here is where you'll want to add in your seasonings.  I used black pepper, a little rosemary, and some homemade Sriracha salt that my roommate received as a gift from our good friend Brittany.

Recipe: Stuffed Acorn Squash - Sriracha Salt

5. When the mushrooms are starting to look close to done, throw in your Spinach.  Spinach cooks up fast, and will add a lovely big of green to your meal-with lots of nutrients.

Recipe: Stuffed Acorn Squash - Add Spinach

6. Your squash should be about done now, so you'll want to pull it out (careful, it's hot!) and slice it in half lengthwise.  You'll then want to scoop out the seeds inside.  It reminded me of pumpkin insides.

Recipe: Stuffed Acorn Squash - Halve Acorn Squash

7.  Now fill your squash halves with your sautéd mixture! 

Recipe: Stuffed Acorn Squash - Stuff Acorn Squash

8. Top with cheese.

Recipe: Stuffed Acorn Squash - Add Cheese

9. Pop back in the oven or under the broiler for another 10 minutes or so until the cheese is melted and bubbly and then it's ready to serve! We paired ours with some baked tilapia, but these could easily be eaten on their own because they are very filling and go a long way.

Recipe: Stuffed Acorn Squash

2.17.2012

Confessing About Yum

I Confess that this may be the perfect man:

Source: facebook.com via Aubrey on Pinterest


I confess that I made the most amazing Turkey Burgers the other night.


1.5 lbs fresh ground turkey (from the butcher at Whole Foods)
1.5 cups chopped mushrooms.
1.5 cups cubed cheese
1 handful Cilantro

Blend it all together and cook on the George Foreman Grill for an amazing burger!

I confess I only made them because I needed something to go with this recipe.

I confess I finally got to try a Blood Orange.
It was sweeter and more mild than a regular orange, and it really looked bloody.


I confess that I've been out to week twice this week and will again tonight.
Wednesday I went and got Pho with Jon, Julie, and Stacey.
Last night I treated my grandmother to Joe's Crab Shack.
Tonight we're all going to KoKo Kitchen for Ramen!


What do you have to confess this week?


Photobucket

12.22.2010

Wordless Wednesday: Cupcakes


These are the double chocolate chip and cranberry cookies I made for my family party.

They came from the recipe book that Beth sent me for the 12 Days of Christmas Swap, and I used the cupcake papers she sent too!   Aren't they cute?  They were very rich.

4.22.2010

Mad Birthday Cake Decorating Skills

So this year I decided to make my own cake.

This would be the first time doing cake from scratch, and the first time attempting to decorate it using both buttercream frosting and fondant. I'll admit, it wasn't without trouble.  

First, it was supposed to be a two tier cake, but the top failed before it even made it out of the pan.

Then, I didn't have enough red food coloring to do red velvet cake.

So I quickly switched to a one tier chocolate cake.


The basis for this was the Marshmallow Fondant recipe I found on a blog, and I wanted to try it very much! 


Marshmallow Fondant Recipe
(via thepolhamusfamily.com)

I'm not usually a fan of fondant, however this recipe struck me as a little different as it's made with mostly marshmallows.  In fact, it tastes so much better than any fondant I've ever had!  It was so very good!  I will admit, working with fondant is a bitch, as it tends to stick to everything and have a hard time spreading, but it was worth it.  My cake turned out so beautifully!

I even added some food coloring, made polka-dots and stuck them on using a little water on a paint brush.  It was adorable!


(Via allrecipes.com)

This recipe was great because it wasn't too sweet, and it was thick and moist.  I loved it!


(Via Wilton.com)

So easy to make.  I just frosted the cake with the buttercream, stuck it in the freezer for a while, and then put the fondant over the top!  It was so rich and yummy!

What do you think of the my first attempt at cake decorating?


2.17.2010

Red Velvet Cupcakes with Cream Cheese Frosting

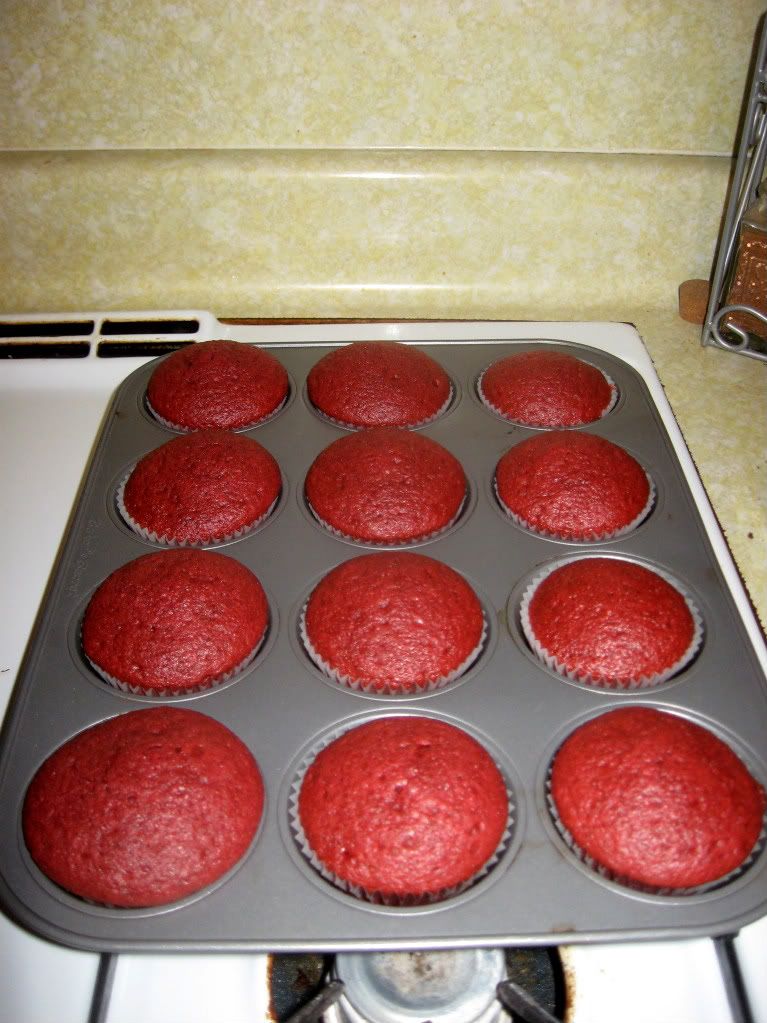
For Valentine's Day I decided to try making Red Velvet Cupcakes, inspired by Have The Cake's February Challenge .  I snagged the recipe I found in this post, and gave it a go!

Ingredients for Cupcakes:

2 ½ cups Cake Flour (not self rising)
2 tbsp Unsweetened Cocoa Powder
1 tsp Salt
1 ½ cups Vegetable Oil
1 ½ cups Sugar
2 Eggs
1 tsp Vanilla
1 container Neon Pink Food Coloring
1 Cup Buttermilk (I used 1 ½ cups)
2 tsp White Distilled Vinegar
1 ½ tsp Baking Soda

Ingredients for Frosing:

8 oz Cream Cheese
¼ cup Butter
1 tsp Vanilla
Confectioner's Sugar


1. Preheat the oven to 350° and line two muffin pans with cupcake liners.

2.  In a bowl mix together Cake Flour, Cocoa Powder, & Salt.

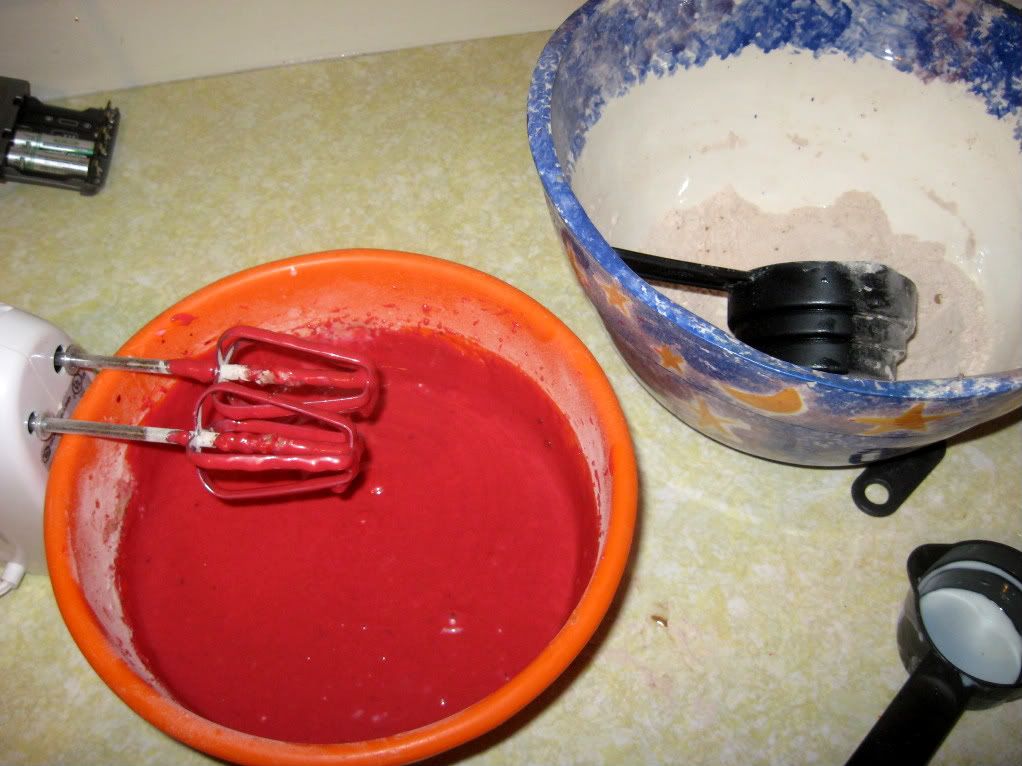
3. In a separate bowl beat the Vegetable Oil and Sugar together with an electric mixer until blended.  Add the eggs in one at a time.  Beat in the Vanilla and Food Coloring.  (Yes, it's the entire bottle!)


4. Add the dry ingredients to the liquids in three batches.  With each batch add a ½ cup of buttermilk.  Mix until combined smoothly.

5.  In a separate small bowl, whisk the Baking Soda and Vinegar together.  This will be foamy.  (It reminds me of those volcanoes you make in Jr. High where you add the two together and let it foam out the top!)  Mix this into the batter until blended.

6.  Pour into cupcake liners and bake for about 20 minutes, or until a toothpick inserted comes out clean.

7.  Let it cool.

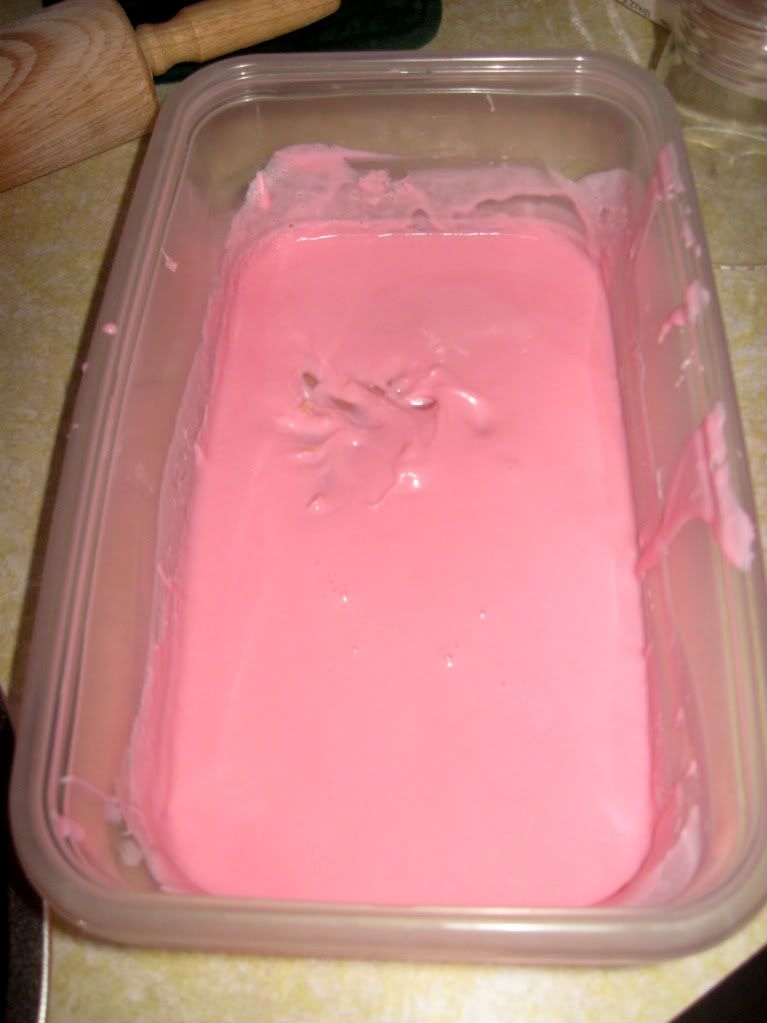
8.  Make your frosting by letting your cream cheese sit out to room temperature.  Then blend it with your Butter, and Vanilla until smooth.  Add the sugar too taste.  In the original recipe she mentioned she liked her more tart, and I completely agree.  I don't like it too sweet because I prefer to taste the cream cheese instead of the sugar.  Like Eli said "I'm a whore for cream cheese!"


I wish I had more cake tools, then I could have made the frosting prettier, instead I just spread it on (thickly) with a knife, and it looked very homemade.  They tasted fabulous and were so moist! 

2.13.2010

Valentines Day Sugar Cookies (Super Yum)


I found this recipe via Blue Cricket Design and had to try it, as I'd never made sugar cookies with Sour Cream in them  before.  I have to say, they were SUPER YUM, and if you like to bake (or maybe even just like to eat cookies) you should try it!

Read her original post on the recipe here.

You will need:

  • 5 Cups Flour
  • 1½ Cups Sugar
  • 1 Cup Melted Butter
  • 1 Teaspoon Vanilla
  • 2 Eggs
  • 1 Cup Sour Cream
  • ½ Teaspoon Salt
  • 1 Teaspoon Baking Powder
  • 1 Teaspoon Baking Soda


*Note, I recently learned that if you end up using Self Rising Flour, you should not add the baking powder or salt, as those come premixed.  You will need them if you use regular baking flour.

Combine Flour, Salt, Baking Powder, and Baking Soda in a bowl.

In a separate bowl, blend together the Sugar, Butter, Vanilla, Eggs, and Sour Cream until smooth.  Pour the wet ingredients into the dry ingredients and then mix together until you have a well blended dough ball.

Wrap the ball in plastic wrap and place in the fridge for 2 or 3 hours or until firm. (I only left it about an hour and a half or so.  What can I say-I'm impatient!)

When making your shapes, make sure to roll out the dough pretty thick, about a half inch or so.


Bake at 375° for about 10 minutes (adjust time as needs be.)  You want the cookies to be about the same color as the uncooked dough. 


After the cookies melt, heat can of pink frosting into a bowl, dip the cookies into the melted frosting and let them drizzle off.  Add sprinkles or other pretty things to the top, and serve!

It made about 16 Large cookies the first time I made this recipe, and 46 small ones when I made it again last night.  The best part?  As long as you keep them wrapped, they stay nice and moist!  They were delicious!

2.04.2010

Homemade Calzones

Last night I tried my hand at making Calzones.  I was inspired by the Hot Pocket Recipe over at My Kitchen Misadventures, and then I made it my own by using her dough recipe, but my own sauce and fillings.  The sauce was completely made from scratch (without a recipe and I totally rocked it!), as was the dough.


Sauce Recipe (An Angie Original!)
  • 1 cup finely diced Onions
  • 3 Cloves Garlic, finely diced
  • 2 tbsp Olive Oil
  • 1 large can Diced Tomatoes
  • 1 can Tomato Paste
  • Handful chopped Cilantro
  • 1 cup chopped Mushrooms
  • Salt
  • Pepper 
  • Italian Seasoning
Put the oil in a big skillet and let it heat up. Throw in the Onions and Garlic in and let them sautee in the bottom a while before throwing the Cilantro in and allowing it to sautee for a bit. Pour in the Tomato Paste, Diced Tomatoes, and the Mushrooms. Allow it to heat and simmer. Add Salt, Pepper, and Italian Seasonings to taste.
 
Dough Recipe (via My Kitchen Misadventures)
  • 1 cup warm water
  • 1 1/2 tsp Yeast
  • 2 tbsp oil (Canola or Olive)
  • 1 tsp Salt
  • 1 tbsp Sugar
  • 2 1/2-3 cups Flour
Dissolve the Yeast in the hot water, then add oil.  In another bowl mix Salt, Sugar, and 2 cups Flour together.  Pour the yeast mixture in and stir together (I used a spoon until it got firm, and then I used my hands) add more flour until it's pulls away from the sides and forms a ball.  You may need more, or you may not, just judge by the texture/looks.

Cover the dough and allow it to rise until the size doubles.  Generally this will take about 45 minutes to an hour.

Separate dough into 4 portions and roll out in to flat round cirlces, and allow to sit for 5 minutes.  Put your sauce in side one half (leaving plenty of room on the sides) and add your filling.

My fillings included: diced green and red peppers, diced tomatoes, sliced mushrooms, pepperoni slices, and mozzerella cheese.  It was delish!


Fold the empty half over (it will have to stretch) and then pinch the sides together and move it to the tray.


This recipe makes about 4 large Calzones.


Bake in the oven at 350 degrees for about 20 minutes.  Pull out and serve!


I served mine with salads, but the Calzones were so big that my guests didn't finish the Calzone after eating the whole salad!  To be fair, the salads were pretty much the works...


They seemed to enjoy the meal!


Related Posts Plugin for WordPress, Blogger...

 photo copyright.jpg
envye template.